How To Replace An Interior Door?
Before diving into the practical steps, let’s understand why replacing an interior door can be a worthwhile endeavor:
- Enhanced Aesthetics: A new door can instantly elevate the overall aesthetics of a room, giving it a more contemporary or classic appearance, depending on your preference.
- Improved Functionality: Over time, interior doors may become squeaky, difficult to open or close, or simply outdated. Replacing them ensures smooth operation and functionality.
- Energy Efficiency: Modern interior doors often come with better insulation properties, contributing to improved energy efficiency within your home.
Tools and Materials You’ll Need
Before you begin, gather the necessary tools and materials to streamline the door replacement process:
- New Interior Door: Choose a door that matches your interior design style, considering factors like material, color, and design.
- Tape Measure: Accurate measurements are crucial for ensuring a proper fit.
- Saw: A saw is essential for trimming the door to the correct height and width.
- Screwdriver: You’ll need this for removing the old door and attaching the new one.
- Chisel: Chisels are useful for mortising hinges and strike plates.
- Wood Shims: These are handy for leveling and securing the door.
- Pencil and Carpenter’s Square: These tools help you mark and cut precisely.
Step-by-Step Door Replacement
Now, let’s proceed with the step-by-step process for replacing your interior door. Taking your time and paying attention to details will ensure a successful outcome:
Step 1: Measure Carefully
Begin by measuring the height, width, and thickness of your existing door. Ensure your new door matches these dimensions. Accurate measurements are the foundation of a successful door replacement project.
Step 2: Remove the Old Door
Before removing the old door, make sure you’re prepared for it. Clear the surrounding area, and have a safe place to store the old door. Now, you can begin:
- Unscrew and remove the hinges from the door and the door frame. Take care not to damage the surrounding frame.
- Once the hinges are removed, carefully lift the old door out of the frame.
- Examine the door frame for any damage, such as rot or termite infestations. If you notice any issues, address them before proceeding with the new door installation.
Step 3: Prepare the Door Frame
With the old door removed, it’s time to prepare the door frame for the new one. Here’s what you need to do:
- Clean the door frame thoroughly, removing any debris or old paint. It’s crucial to have a clean and smooth surface for the new door installation.
- Check if the door frame is level and plumb. If it’s not, you may need to adjust it using shims to ensure that the new door will hang properly.
Step 4: Trim the New Door
Now that the door frame is ready, you can move on to the new door. Depending on the measurements you took earlier, you may need to trim the new door to fit the frame perfectly. Follow these steps:
- Measure and mark the areas on the new door that need to be trimmed. Be precise in your measurements and markings to ensure a proper fit.
- Use a saw to make the necessary cuts, following your marks closely. Take your time to ensure straight and clean cuts.
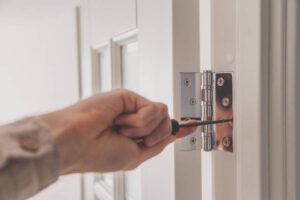
Step 5: Install the Hinges
Properly installing the hinges is crucial for the functionality of the new door. Here’s how to do it:
- Position the hinges on the door according to the markings on the frame. Ensure they are evenly spaced and at the correct height.
- Use a chisel to mortise the hinge recesses on both the door and the frame. This step ensures that the hinges sit flush with the surface and allows the door to open and close smoothly.
Step 6: Hang the Door
With the hinges installed, it’s time to hang the new door in the frame:
- Carefully align the door with the frame, making sure the hinges on the door match up with the hinge recesses on the frame.
- Secure the hinges in place using screws, ensuring that they are tightened properly. This step is crucial for the stability and security of the door.
- Test the door by opening and closing it several times to ensure it swings smoothly and without any obstructions.
Step 7: Install the Knob and Latch
The doorknob and latch are the final pieces to complete the installation:
- Follow the manufacturer’s instructions to install the doorknob and latch on the door. Ensure they are correctly aligned and functioning smoothly.
Step 8: Check for Proper Fit
Close the door and check for any gaps or misalignment:
- If you notice gaps around the edges of the door, you can use wood shims to fill them and create a snug fit. Make sure the door closes securely without any drafts or light seeping through.
Step 9: Add Finishing Touches
Now that your new door is securely installed, it’s time to add the finishing touches:
- Fill any gaps or holes around the door frame with wood putty. Allow it to dry and sand the surface to create a smooth and seamless finish.
- Paint or stain the door and frame to match your interior design. This step not only enhances the aesthetics but also provides protection against moisture and wear.
Conclusion
By following these steps, you can successfully replace an interior door and enhance the beauty and functionality of your living space. This DIY project not only adds value to your home but also allows you to enjoy a fresh and updated interior.
Remember, a well-chosen and well-installed interior door can make a significant difference in your home’s overall appeal. So, roll up your sleeves, gather your tools, and embark on this home improvement journey. Your newly replaced interior door will be a testament to your craftsmanship and attention to detail.
In conclusion, replacing an interior door is a DIY project that offers both aesthetic and functional benefits. Taking the time to measure accurately, prepare the door frame, and install the new door properly will ensure a smooth and successful outcome. Now that you know how to install an interior door, you will hopefully be willing to take on the challenge.
With your newly installed interior door, you’ll enjoy improved aesthetics, better functionality, and enhanced energy efficiency in your home. So, don’t hesitate to tackle this project and transform your living space into a more comfortable and stylish environment. Click here to go back to our home page an search for a contractor if you wish.https://www.mypreferredremodeler.com